Building the Patina: NRB Cover Project Recap – Part 2

An overview of designing and printing book cloth for New River Breakdown,  Terry Kennedy‘s poetry collection from Unicorn Press . You can see the finished book covers from this project at Unicorn Press. Recap Part one is here.

The Creation Process: Step 1 – Grabbing the bull by the horns

Armed with a concept to create riverbed patina, it’s time to roll up my sleeves and start the actual making. First the canvas for this creation–the 13 yards of linen–needs to be tamed. Meaning: washed, cut into smaller pieces, and hemmed to reduce fray during the process.

cutting 13 yards into panels
Cutting the linen into 7 panels ( 5 72″ x 54″ and 2 65″ x 54″ panels).

hemming edges of 7 panels to reduce fray
Hemming edges of each panel to reduce fray.
after cutting down: 7 panels of fabric
The linen, ready for the 1st layer of patina.

Step 2 – Layer cake

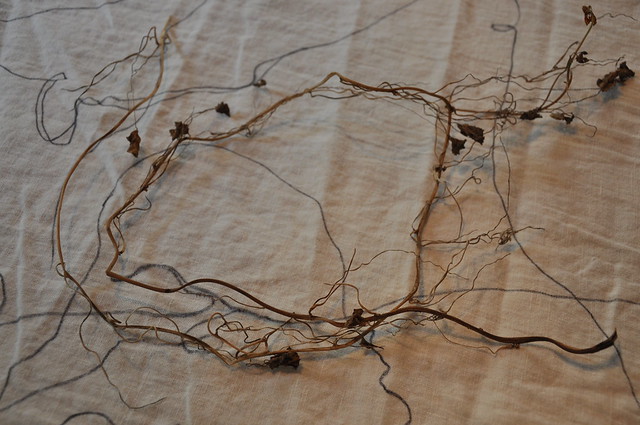
It’s time to make some marks! The first layer of the patina process is ink. I drew flowing lines across the cloth, inspired by dried nasturtium vines and other collected organic materials.

1st layer - ink/drawing freehand
Using vines to inspire freehand lines.
1st layer - ink/drawing freehand
Dried nasturtium leaf, ink lines on linen.
1st layer - ink/drawing freehand
Freehand lines swooping across the linen.
1st layer - freehand drawing
A panel hanging, ready for the next layer.

The 2nd layer of the patina is a  freehand painted pattern (inspired by dead lilies) screen-printed onto the cloth.

painting screen for 1st printed layer
Painting the screen for layer 2 using screen block fluid.
printing 1st print layer
Printing layer 2 in white, silver and transparent inks.
drying: first print layer
Layer 2, printed; because it’s essentially white on white, it’s a little hard to see, but don’t worry. Once the fabric is dyed, it will be very different.

Layer 3 and 4 are screen-printed layers of collected organic material in neon oranges and magentas.

screen #2 - collected organic matter
Collected organic materials, most found on walks in my neighborhood, ready to burn a screen.
screen #2 - collected organic matter
The burned screen, drying.
printing 2nd screen layer - organic material
Printing layer #3 in bright neon orange.
2st layer - printing 2nd layer
Backlit, you can see the white layer along with the orange layer.
printing 3rd layer
Printing layer #4 in bright magenta.
burning screen # 4
Meanwhile, screen for layer #5 – more organic shapes.
print drying
Layer #4 drying, You can see some animal prints. Layer 4 includes footprints from the author Terry’s dog, who’s referenced in the title poem of the book.

Patina layer #5 is another organic layer, this time printed in greed. I wanted some shapes to cover larger areas of the cloth so this layer includes larger fern and cucumber vine leaves.

printing 4th print layer
Layer #5 screen (the 4th printed layer) ready to print.
prepare for dye bath
The printed fabric, ready to wash and dye.
prepare for dye bath
Here you can see the way the layers are overlapping each other, changing the colors and negative shapes in the composition.

Step 3 – Letting nature take  course

Now that I’ve built up several layers lines and shapes, it’s time to see what washes away and what stays. Linen is a naturally resilient fabric, it resists marks, meaning everything I’ve built up so far could all wash away completely. Hopefully, it won’t and I’ll be left with a pleasantly faded version of the color layers I have now. First I iron all the cloth between sheets of paper to set the ink into the cloth, then it’s time to wash up.

fabric - after 1st wash - pre dye
All washed up: One the right you can see the fabric before it’s washed, on the left you can see a panel that’s already been through the washer. The fabric is still wet in this photo so the contrasts are brighter.
fabric - after 1st wash - pre dye
Here’s the fabric after washing, you can see the way that quite a bit washed way and the overlapping colors are more obvious now.
fabric - after 1st wash - pre dye
Here you can see the way the washing process faded the ink and revealed the texture of the linen.

After washing, the texture of the linen comes through the layers adding an additional element to the composition, making it even richer. The bright inks are still very stark on the white fabric, but the dye process will take the edge off of this, hopefully. The next step is the scariest. I never know exactly what’s gonna come out of the dye bath. It’s time to hold my breath and dive in.

Next: Taking the composition from large to small: New River Breakdown Cover Project Recap – Part 3

3 thoughts on “Building the Patina: NRB Cover Project Recap – Part 2

Leave a comment